Materials:
Embroidery Hoop (optional)
Pearl Cotton Embroidery Thread
Embroidery Needle
Scissors
Iron
Ruler
Pin
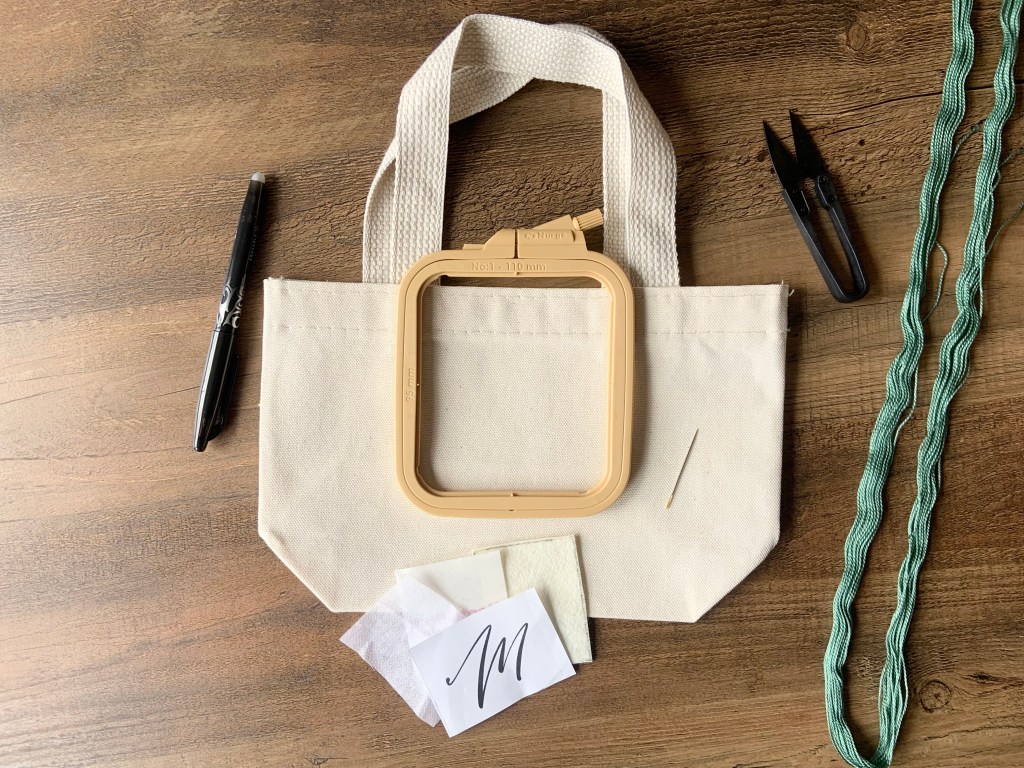
Print out your letter about 1.5″ tall.
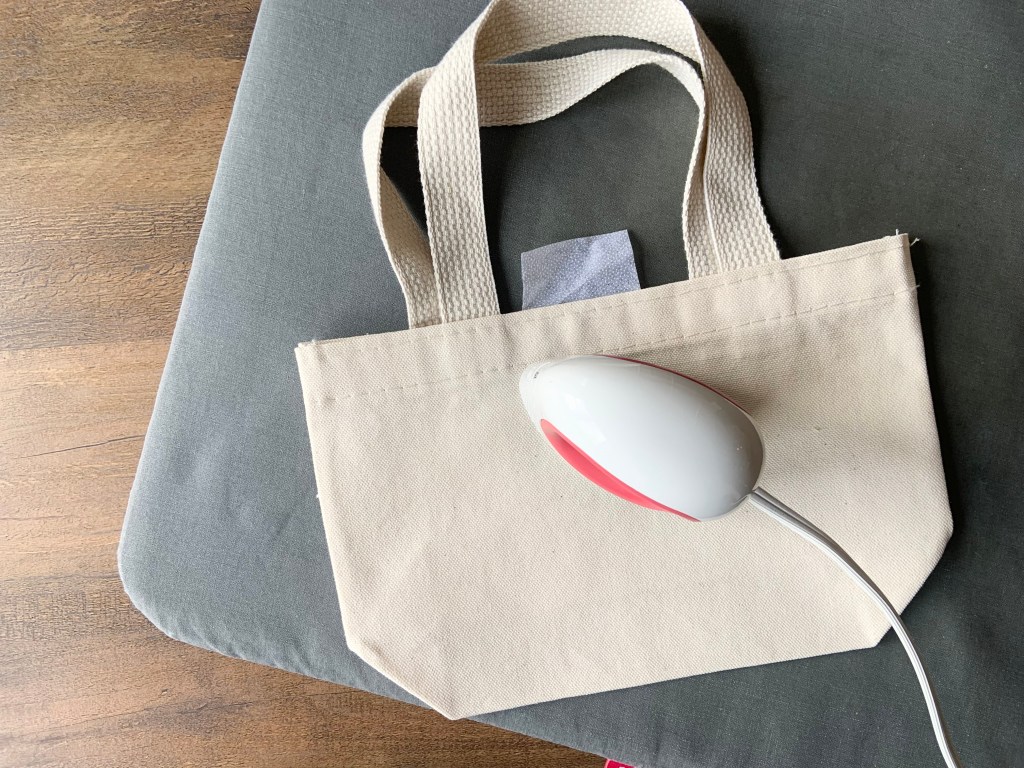
Cut a piece of fusible interfacing to use as a stabilizer behind your stitching. This will help prevent the back of your work from being seen through the bag and will help to stabilize your stitches. I am cutting a rectangle 2″l x 2.5″w. Center to where your stitches will be and iron to the inside of the bag.
Cut a piece of double sided adhesive and felt the same size – place to the side, we’ll use these at the end.

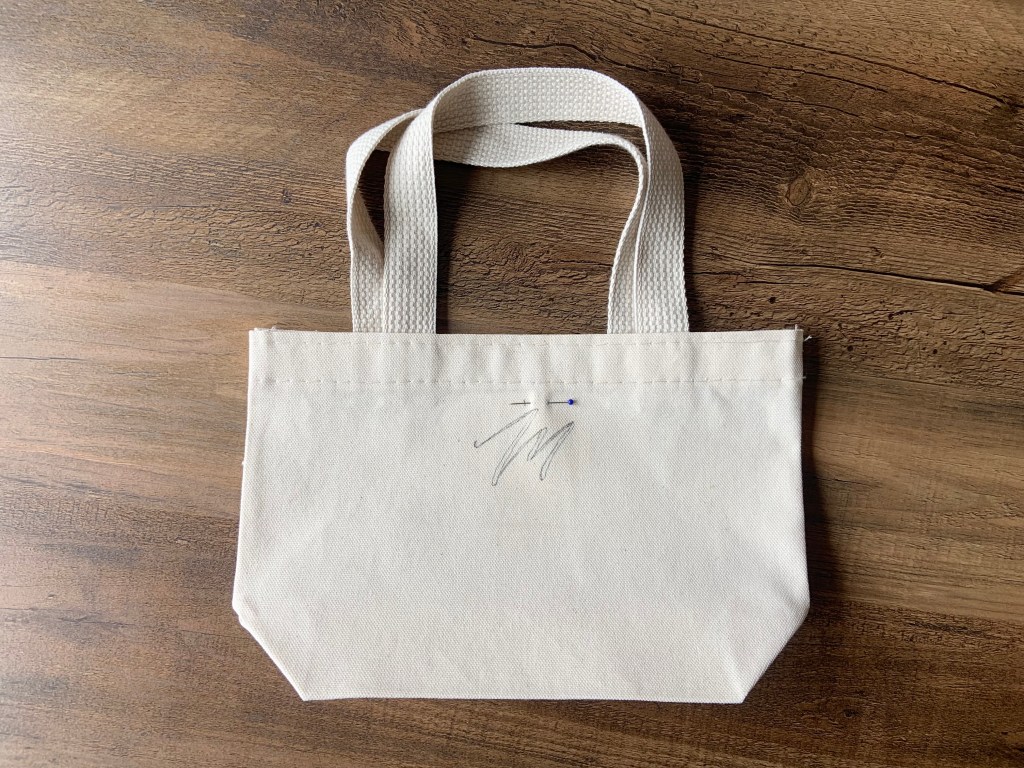
Trim your paper and place your letter inside your tote. I am centering mine on the bag towards the top, but you can place your letter anywhere you’d like. With a light source behind your bag trace your letter onto your tote using your heat erasable pen. You could also free hand a letter onto your tote.
If you’d like to use an embroidery hoop, center your hoop over your letter and attach. The totes are strong enough with the interfacing backing your stitches, so an embroidery hoop isn’t necessary.

Cut a workable length of embroidery floss. Tie a knot on the end and begin stitching along your letter. I am using a back stitch, but feel free to use any embroidery stitch you’d like! Make sure your tote handles are folded down and out of your way.


Once your stitching is complete, iron the double sided adhesive to your cream felt following the manufacturers instructions. Then, iron the felt and adhesive to the back of your work to protect your stitches.

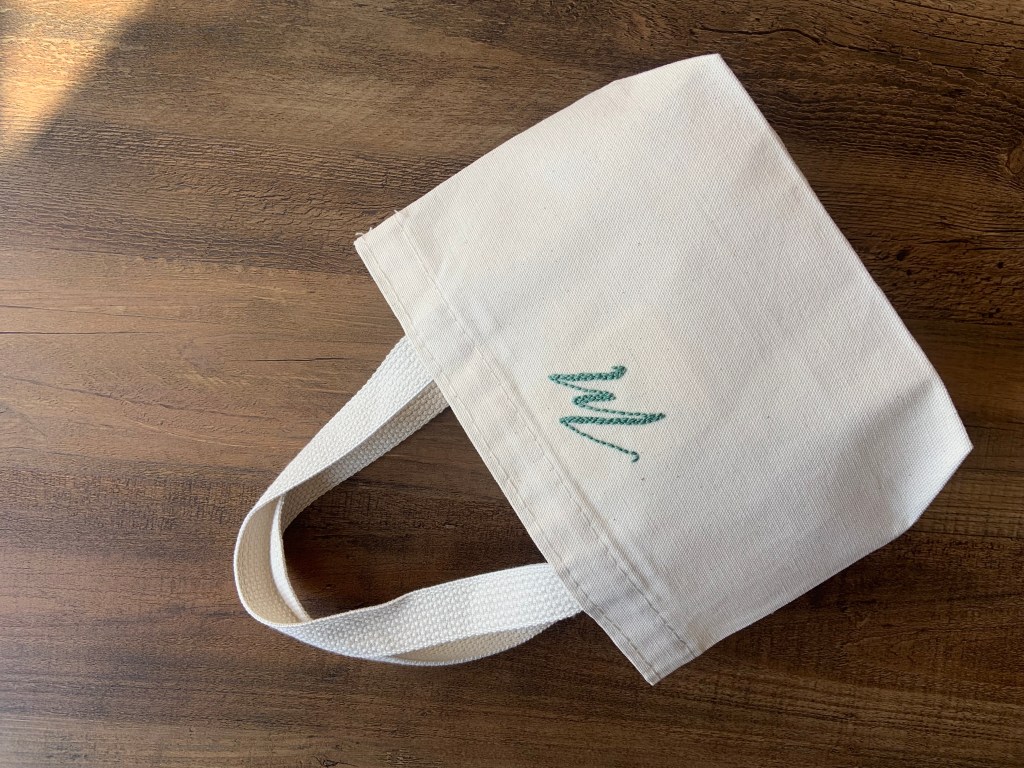
Enjoy your embroidered tote yourself or fill with goodies and use as a gift – think bridesmaids, birthdays, holidays, or just because!
